Generating Objects
You can generate new objects that fully describes a feature of interest or anatomy after you have created a group of paths that outlines the feature of interest or anatomy (see Creating Groups of Paths). Options for optimizing object generation can be selected on the Generate tab (see Generate Tab).
- Select the required group of active contour paths in the Data Properties and Settings panel.
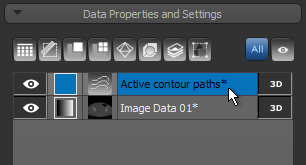
- Select the paths you want to use to generate the new object in the list of paths box, as shown below.
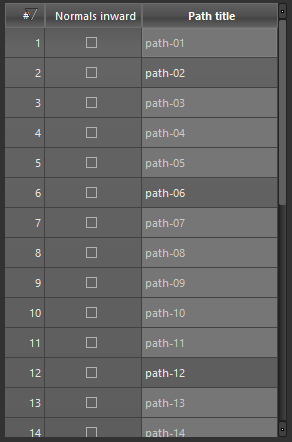
Note You can Ctrl-click to add paths to a selection one-by-one, or you can Shift-click to select paths within a range. Press Ctrl + A or your keyboard to select all paths in the group.
-
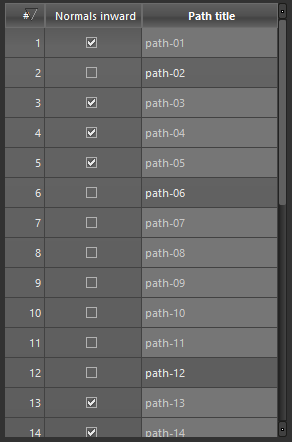
Check the 'Normals inward' option for paths in which the normal direction is inward, as shown below.
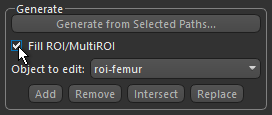
- Select the required settings on the Generate tab (see Generate Tab).
Note Important considerations for generating objects from selected paths are the reparametrization points and the direction of the normals.
-
Check the Fill ROI/Multi-ROI option in the Generate box if want to generate a filled region of interest or multi-ROI.
- Click the Generate from Selected Paths button.
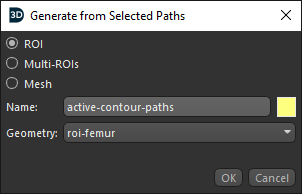
The Generate from Selected Paths dialog appears, as shown below.
-
Do the following, as required.
-
Select the required output — ROI, Multi-ROI, or Mesh.
-
Choose a new name and color for the generated object, if required.
-
Choose a geometry for the generated object, if you selected ROI or Multi-ROI as the output.
-
Click the OK button.
The object generated from the active contour paths appears in the Data Properties and Settings panel.
- Evaluate the generated object by scrolling through the dataset in different MPR views or examine the new object in the 3D view.

If required, you can edit the included paths or add additional paths and then re-generate the required object.

